Citrix XenApp is a product that extends Microsoft Remote Desktop Session Host desktop sessions and applications to users through the Citrix HDX protocol.Citrix XenApp and Remote Desktop Services allow Windows applications and computing resources to be centrally managed in a secure data center. Users can access the applications from anywhere and from non-Windows clients
Before I begin the install of XenApp 6.5 I've configured the following first
- A Windows 2008 domain (ictops.org).
- 2 Windows 2008 R2 64bit servers for the XenApp servers and the web interface.
- A Windows 2008 R2 server for the license server.
- A Windows 7/8 Machine
The XenApp Installation-Configurations includes the following
- Prepare the Media - (Download XenApp 6.5 ISO)
- Install License Server Role
- Install XenApp Server Role
- Install Web Interface Role
- Configure License Server Role
- Configure XenApp Server Role - (Create New Farm/ SQL Express DB Installation)
- Configure Web Interface Role - ( Create Sites / Configure Sites)
- Publishing An Application on XenApp Server- (Install Citrix Receiver)
Mean while i don't want to Setup AD and we configure all the Services (XenApp-DB / License Server / Web Interface) on A Single Windows 2008 Server
(Machine Name :- WIN-85CLBN5A8QJ)
- Download the XenApp 6.5 ISO from Citrix Sites and burn into a Disk or USB storage
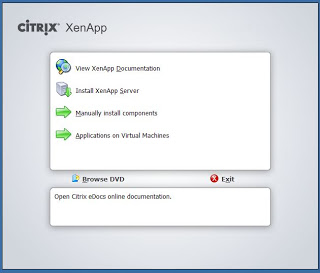
- Insert the Media into the Windows 2008 Server and Select Install XenApp Server
( It's ask for installing Dotnet frame work 3.5 on the server)
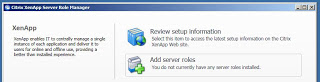
3. Once the install of .Net 3.5 has finished and the Citrix XenApp Server Role Manager starts click on Add Server Roles.
4. You will be prompted to select your edition of XenApp. (Me Select Platinum Edition) and Agree the License
5. Here, I'm going to install the XenApp and Web Interface And License Server role on the same server but if this is a production environment have a look here to see how you can split the roles out.
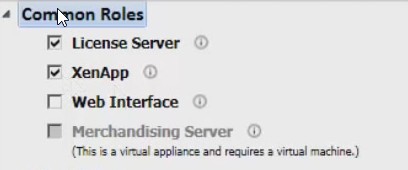

I also have added the XML integration as this let the Citrix XML port and IIS share port 80, if you have a requirement to separate these do not select it.
6. Review what is going to be installed and click next.The installation requires a restart.

7. After rebooting will get the Prompt Like “Resume Install” . Otherwise Open
“Citrix XenApp Server Role Manager “ ( Start ---> Administrative Tools ---> Citrix --->Citrix XenApp Server Role Manager )
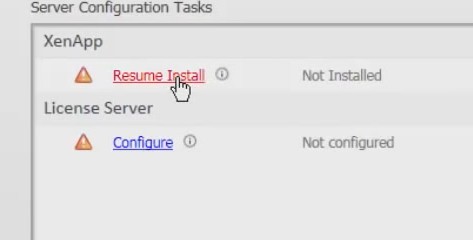
8. After Completing the Installation, need to configure roles (License ,XenApp)
9. Configuring License Server Role
(Start ---> Administrative Tools ---> Citrix ---> Citrix XenApp Server Role Manager )

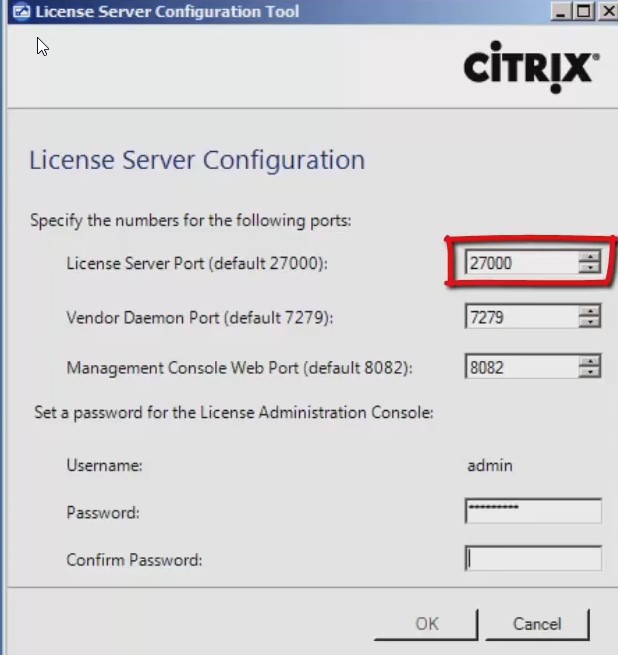

10. Need to Specify the Licensing (Click On Specify Licensing)
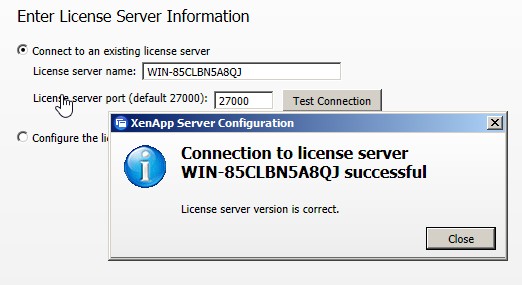
11. You will get an error like below .Ignore it and continue

Note :- We have not uploaded any license, this is bz we will get this error

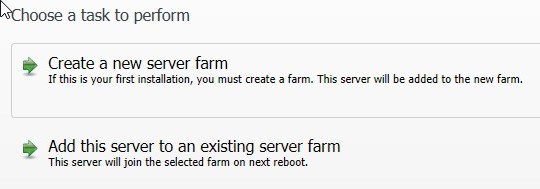
12. Configure XenApp Server Role On Server
To Configure XenApp server, we need to create a Citrix Farm
Citrix Farm is a Connection of Citrix XenApp Server. So this is new server installation so we need to select “ Create a New Server farm “

13. Create a Database For Citrix Farm.
It contains all static informations like Farm Configuration, Published application configuration and Server Configuration
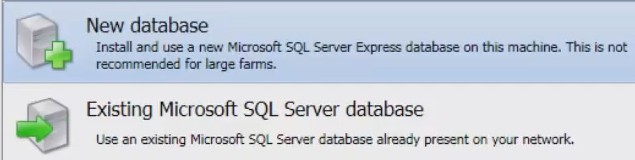
Click on DB, this will instal SQL Express DB on the server.
Enter User Credentials ---> Configure Shadowing --->Advanced Server setting-(Data Collection/XML Service/Receiver/RDp users)

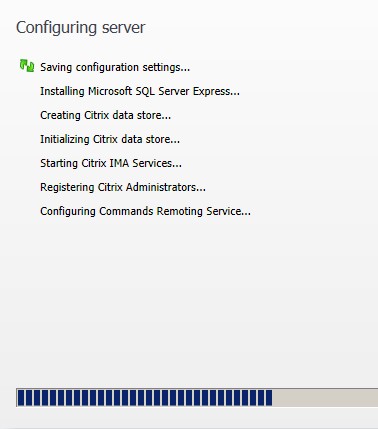
After Installation of SQL DB , Restart the server
14. Configure Web Interface On Server
I already installed web interface Role on server, so need to configure Web Interface on the server
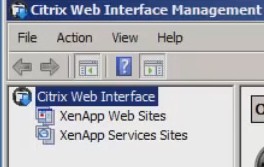
(Start ---> Administrative Tools ---> Citrix ---> Management Console ---> Citrix Web Interface Management)
In the Citrix Web Interface Management Console, there have two Option
XenApp Web Sites and XenApp Services Sites
(Start ---> Administrative Tools ---> Citrix ---> Management Console ---> Citrix Web Interface Management --->XenApp Website ---> Create sites
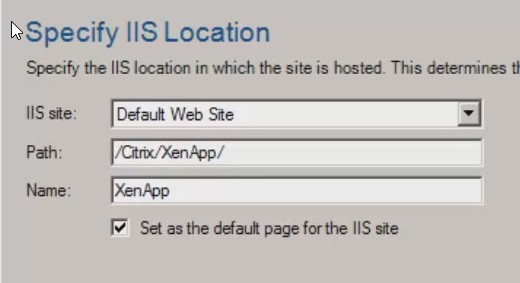
16. Configure Sites
After successfully create the Web site, then configure the sites
To Configure sites, we need to specify Server Farm (We already created a Server Farm during the XenApp role installation).So specify that name.(here Eg :- New Farm)
Specify the Server / Servers (Multiple XenApp Servers) in failover order
Specify Authentication method ---> Domain Restrictions → Specify Logon Screen Appearance ---> Select Published Resource Type

17. Publishing An Application on Citrix XenApp Server
- Logon to the XenApp Server
- Open Citrix AppCenter
( Start ----> Administrative Tools ---> Citrix ----> Management Consoles ---> Citrix AppCenter)
- Get a Console “ Configure And Run Discovery “
- Uncheck the option “ Single Sign-On “
- Add Citrix Server (Add Local Computer) - Eg :- WIN-85CLBN5A8QJ
Application Publishing.
- Open Citrix AppCenter
( Start ----> Administrative Tools ---> Citrix ----> Management Consoles ---> Citrix AppCenter )
- Expand Farm Name (Eg :- New Farm)
- Select Applications ---> Click On Publish Application ---->Enter Name ----> Location ----> Configure Server (On Which Published Application will run) --- > Users --->Finish
18. Testing From A Client Machine / Access Published Application
- Logon to the Client Windows 7 /8 Machine
- Open Browser and Type XenApp Server IP / Domain Name
- Select Skip To Logon
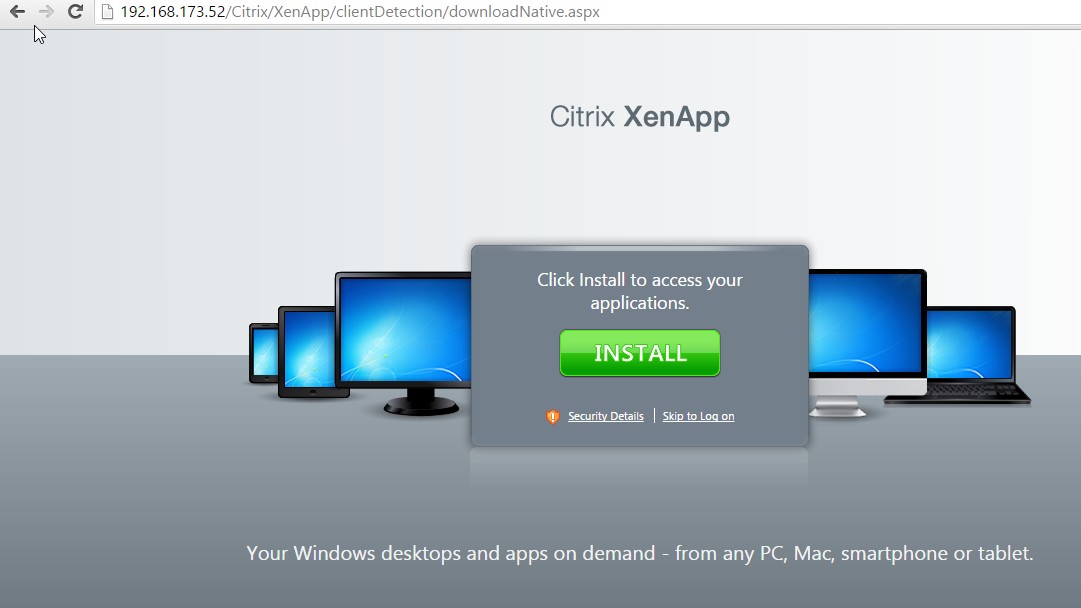


We can see the Published application but we are not able to Open the applications, because we have not install the Citrix Receiver on this client machine
19. Citrix Receiver On Client Machine
- Insert the XenApp Server ISO burned Media
- Install/Run Program from the Media
- Click On Manual Install Components ----> Common Components ---->
- Select “ Plugins And Streaming Profiler “ ----> Select Citrix Receiver
After the installation. Try to access the Published application.

